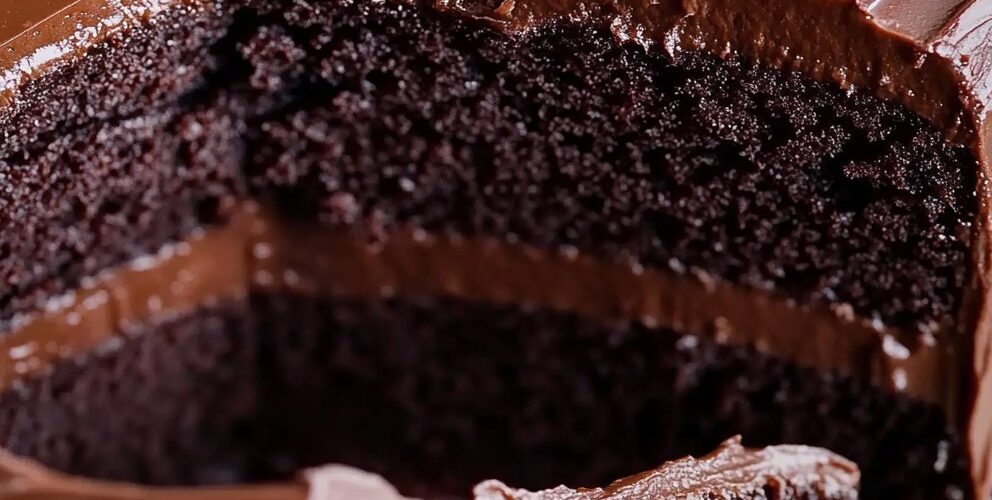
Introducción: Puro placer del chocolate
Hay algo innegablemente mágico en un pastel de chocolate perfectamente elaborado. De esos que son profundamente ricos, increíblemente jugosos y están cubiertos con un sedoso glaseado de chocolate que se derrite en la lengua. Esta exquisita receta de pastel de chocolate ofrece precisamente esa experiencia: un postre intensamente chocolatoso que transforma momentos cotidianos en celebraciones. Ya sea que estés celebrando una ocasión especial o simplemente se te antoje algo sublimemente dulce, este pastel es el sueño de cualquier amante del chocolate.
Ingredientes
Para el pastel:
- 1 3/4 tazas de harina para todo uso (220 g / 7,8 oz)
- 1 1/2 cucharadita de polvo para hornear (7 g)
- 1 1/2 cucharadita de bicarbonato de sodio (7 g)
- 1/2 cucharadita de sal (3 g)
- 3/4 taza de cacao en polvo sin azúcar (75 g/2,6 oz)
- 2 tazas de azúcar granulada (400 g/14,1 oz)
- 2 huevos grandes, a temperatura ambiente
- 1 taza de leche entera (240 ml/8,1 fl oz)
- 1/2 taza de aceite vegetal (120 ml/4 fl oz)
- 2 cucharaditas de extracto de vainilla (10 ml)
- 1 taza de agua hirviendo (240 ml/8,1 fl oz)
Para el glaseado de chocolate:
- 1/2 taza de mantequilla sin sal (113 g / 4 oz)
- 2/3 taza de cacao en polvo sin azúcar (65 g/2,3 oz)
- 3 tazas de azúcar en polvo (360 g/12,7 oz)
- 1/3 taza de leche entera (80 ml/2,7 fl oz)
- 1 cucharadita de extracto de vainilla (5 ml)
- Una pizca de sal
Instrucciones
Para el pastel de chocolate:
- Precalienta el horno a 175 °C (350 °F). Engrasa bien dos moldes redondos para pastel de 23 cm (9 pulgadas) y forra la base con papel vegetal. Espolvorea los lados con harina o cacao en polvo, retirando el exceso.
- En un tazón mediano, bata la harina, el polvo para hornear, el bicarbonato de sodio, la sal y el cacao en polvo hasta que estén bien combinados sin grumos de cacao visibles.
- En un tazón grande, combine el azúcar, los huevos, la leche, el aceite vegetal y el extracto de vainilla. Bata con una batidora eléctrica a velocidad media durante unos 2 minutos hasta que la mezcla esté suave y bien integrada.
- Con la batidora a baja velocidad, añada gradualmente los ingredientes secos a la mezcla húmeda en tandas, mezclando justo hasta que se integren después de cada adición. Raspe los lados del tazón según sea necesario para asegurar una mezcla uniforme.
- Añade con cuidado el agua hirviendo a la masa, batiendo a baja velocidad hasta que se integre. La masa quedará bastante líquida; esto es normal y le da la textura húmeda característica del pastel.
- Reparte la masa uniformemente entre los moldes preparados. Golpea suavemente cada molde contra la encimera varias veces para eliminar las burbujas de aire.
- Hornee en el horno precalentado durante 30-35 minutos, o hasta que al insertar un palillo en el centro éste salga limpio o con algunas migas húmedas (pero sin masa húmeda).
- Deje enfriar los pasteles en los moldes durante 10 minutos y luego pase un cuchillo por los bordes para despegarlos. Dé la vuelta sobre una rejilla, retire el papel de horno y deje enfriar completamente antes de glasear.
Para el glaseado de chocolate:
- En una cacerola mediana, derrita la mantequilla a fuego lento, teniendo cuidado de no dorarla.
- Once melted, remove from heat and whisk in the cocoa powder until smooth and glossy.
- Gradually add the powdered sugar, alternating with the milk, whisking continuously until smooth. Add the vanilla extract and pinch of salt, mixing until fully incorporated.
- If the frosting seems too thick, add a little more milk, one teaspoon at a time. If too thin, add additional powdered sugar, one tablespoon at a time, until you reach the desired spreading consistency.
Assembly:
- Once the cake layers are completely cool, place one layer on a serving plate or cake stand.
- Spread approximately one-third of the frosting over the top of the first layer, extending it just to the edges.
- Carefully place the second cake layer on top, ensuring it’s centered.
- Apply a thin layer of frosting all over the cake to seal in crumbs (this is called a “crumb coat”), then refrigerate for 15-20 minutes to set.
- Spread the remaining frosting over the top and sides of the cake, creating decorative swirls if desired.
- Allow the frosting to set for about 30 minutes before slicing and serving.
Nutritional Information and Timing
Preparation Time: 25 minutes
Cooking Time: 30-35 minutes
Cooling Time: 2 hours
Total Time: Approximately 3 hours
Servings: 12 slices
Nutritional Information (per slice):
- Calories: 525
- Protein: 6g
- Carbohydrates: 80g
- Fiber: 4g
- Fat: 22g
- Saturated Fat: 8g
- Cholesterol: 55mg
- Sodium: 340mg
- Sugar: 60g
- Calcium: 80mg
- Iron: 2mg
Cooking Tips and Tricks
- Coffee Substitution: For an even deeper chocolate flavor without adding coffee taste, substitute the boiling water with hot freshly brewed coffee. The heat activates the cocoa while the coffee enhances the chocolate notes.
- Room Temperature Ingredients: Ensure eggs and milk are at room temperature before mixing. This creates a smoother batter and more even incorporation of ingredients.
- Don’t Overmix: Once you add the flour, mix just until combined. Overmixing develops gluten, which can result in a tougher cake.
- Even Baking: For perfectly level cake layers, use cake strips around your pans or reduce oven temperature to 325°F (165°C) and extend baking time by 5-7 minutes.
- Testing Doneness: The toothpick test is reliable, but you can also gently press the center of the cake – it should spring back when fully baked.
- Cooling Completely: Patience is key! Ensure the cake layers are completely cool before frosting to prevent melting and sliding.
- Frosting Technique: For a smoother finish, heat your metal spatula or knife under hot water, wipe dry, and then use it to spread the frosting.
Variations and Substitutions
- Gluten-Free Version: Replace all-purpose flour with a 1:1 gluten-free flour blend that contains xanthan gum.
- Dairy-Free Alternative: Use plant-based milk (almond, oat, or soy) and dairy-free butter substitutes in both the cake and frosting.
- Reduced Sugar Option: Decrease sugar in the cake to 1 1/2 cups and use 2 1/2 cups powdered sugar in the frosting for a less sweet version.
- Flavor Variations:
- Add 1 teaspoon of espresso powder to the dry ingredients
- Include 1/2 teaspoon of cinnamon and a pinch of cayenne for a Mexican chocolate twist
- Mix in 1 tablespoon of orange zest to the batter for chocolate-orange flavor
- Add 1/4 teaspoon of almond extract to the batter for subtle depth
- Frosting Alternatives:
- Cream cheese frosting with a touch of cocoa
- Vanilla buttercream for contrast
- Chocolate ganache for an extra-decadent coating
- Filling Options:
- Spread raspberry jam between layers
- Add a layer of chocolate mousse
- Include sliced strawberries on top of the filling
Common FAQs
Q: Why is my cake batter so thin? Did I do something wrong?
A: The thin batter is intentional and a hallmark of this recipe! The addition of boiling water creates a loose batter that results in an exceptionally moist cake with tender crumb. Trust the process – it works!
Q: Can I make this cake in advance?
A: Yes! The cake layers can be baked up to 2 days ahead, cooled completely, and wrapped tightly in plastic wrap. Store at room temperature. The frosting can be made 1 day ahead and stored in the refrigerator – just bring to room temperature and re-whip before using.
Q: My cake is sticking to the pan. How can I prevent this?
A: Be thorough when preparing your pans: grease them generously, line the bottoms with parchment paper, and dust the sides with either flour or cocoa powder. Allow the cakes to cool for exactly 10 minutes in the pans before removing – too soon and they may break, too long and they might stick.
Q: Can I use natural cocoa powder instead of Dutch-processed?
A: This recipe works with either type of cocoa powder. Natural cocoa powder will give a slightly more acidic flavor profile, while Dutch-processed provides a smoother, mellower chocolate taste.
Q: How do I convert this recipe for cupcakes?
A: This batter yields approximately 24-30 standard cupcakes. Fill liners 2/3 full and bake at 350°F (175°C) for 18-22 minutes. Reduce the frosting recipe by 1/3 for a perfect amount to top the cupcakes.
Storage and Make-Ahead Tips
- Room Temperature Storage: The frosted cake can be stored at room temperature, covered with a cake dome or loosely with plastic wrap, for up to 3 days.
- Refrigeration: For longer storage, refrigerate the frosted cake, covered, for up to 5 days. Allow slices to come to room temperature before serving for the best flavor and texture.
- Freezing Unfrosted Layers:
- Cool completely
- Wrap each layer individually in plastic wrap, then in aluminum foil
- Freeze for up to 2 months
- Descongelar durante la noche en el refrigerador antes de desenvolverlo y glasearlo.
- Pastel glaseado congelado:
- Coloque el pastel glaseado en el congelador, sin tapar, hasta que el glaseado se endurezca.
- Envuelva bien todo el pastel en film transparente y luego en papel de aluminio.
- Congelar hasta por 1 mes
- Descongelar durante la noche en el refrigerador con el envoltorio intacto, luego llevar a temperatura ambiente antes de servir.
- Cronograma de preparación anticipada para ocasiones especiales:
- Hasta 2 meses antes: Hornear las capas del pastel y congelarlas.
- 2 días antes: descongele las capas de pastel en el refrigerador
- 1 día antes: Preparar el glaseado y armar el pastel.
- Día de servicio: Dejar a temperatura ambiente durante 1-2 horas antes de servir.
Este pastel de chocolate con su glaseado aterciopelado representa la perfección del postre de chocolate. La combinación de capas de pastel tiernas y jugosas con un glaseado rico y suave crea una experiencia de chocolate reconfortante y lujosa a la vez. Ya sea para una celebración de cumpleaños, una reunión navideña o simplemente como un capricho de fin de semana, este pastel sin duda provocará suspiros de placer y pedirá otra ración.