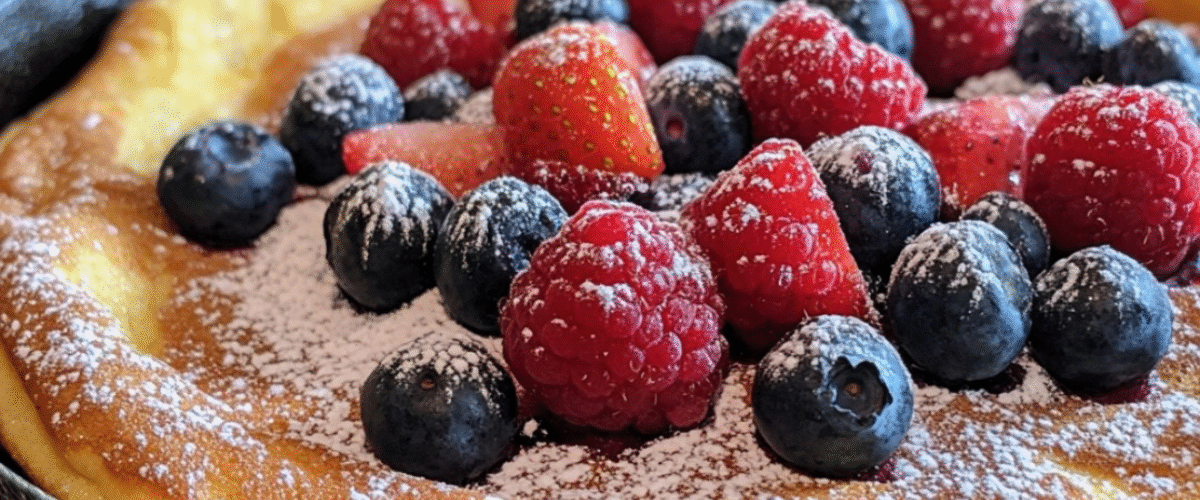
Hay algo mágico en un panqueque holandés recién salido del horno: bordes increíblemente inflados, un centro tierno con textura de crema pastelera y ese delicioso chisporroteo al emerger dorado y aromático. Esta delicia para el desayuno combina lo mejor de los panqueques, crepas y popovers en un plato impresionante y sumamente fácil de preparar. Cubierto con bayas frescas de temporada y una ligera capa de azúcar glas, es una forma sencilla de mejorar tu rutina matutina o impresionar a tus invitados el fin de semana.
Ingredientes
Para el bebé holandés:
- 3 huevos grandes, a temperatura ambiente
- 2/3 taza (83 g) de harina para todo uso
- 2/3 taza (160 ml) de leche, temperatura ambiente
- 1/4 cucharadita de sal
- 1/2 cucharadita de extracto de vainilla
- 2 cucharadas (25 g) de azúcar granulada
- 2 cucharadas (28 g) de mantequilla sin sal
Para la cobertura:
- 2 tazas de bayas mixtas (arándanos, frambuesas, fresas)
- 2 cucharadas de azúcar en polvo para espolvorear
- Jarabe de arce para servir (opcional)
Instrucciones
Paso 1: Prepare el horno y la masa
- Coloque una sartén de hierro fundido de 10 pulgadas en el horno y precaliéntela a 425 °F (220 °C).
- Mientras se calienta la sartén, agregue los huevos, la harina, la leche, la sal, el extracto de vainilla y el azúcar granulada a una licuadora.
- Licue a velocidad media-alta hasta que la mezcla esté completamente suave, aproximadamente 30 segundos.
- Deja reposar la masa durante 5 minutos. Esto ayuda a que la harina absorba el líquido y da como resultado un panqueque más tierno.
Paso 2: Prepara el molde y hornea
- Cuando el horno alcance la temperatura, retira con cuidado la sartén caliente utilizando guantes de cocina.
- Añade la mantequilla a la sartén caliente y gírala para cubrir el fondo y los lados mientras se derrite.
- Vierta inmediatamente la masa en el centro de la sartén untada con mantequilla.
- Regrese la sartén al horno y hornee durante 20 minutos, hasta que el Dutch Baby esté inflado notablemente y dorado en los bordes.
- No abra la puerta del horno durante la cocción, ya que los cambios de temperatura pueden impedir un correcto levado.
Paso 3: Agregar los ingredientes y servir
- Mientras se hornea el Dutch Baby, lave las bayas y corte las más grandes si es necesario.
- Cuando esté listo, retira el Dutch Baby del horno: comenzará a desinflarse casi inmediatamente, lo cual es normal.
- Cubrir rápidamente con las bayas frescas mientras aún esté caliente.
- Espolvoree generosamente con azúcar en polvo utilizando un colador de malla fina.
- Cortar en gajos y servir inmediatamente, con jarabe de arce al lado si lo desea.
Información nutricional
Por porción (basado en 4 porciones):
- Calorías: 225
- Grasa total: 10 g
- Grasas saturadas: 5 g
- Colesterol: 160 mg
- Sodio: 200 mg
- Carbohidratos totales: 26 g
- Fibra dietética: 2 g
- Azúcares: 12g
- Proteína: 8g
Tiempo de preparación: 10 minutos Tiempo de cocción: 20 minutos Tiempo total: 30 minutos Porciones: 4
Consejos y trucos de cocina
- Room Temperature Ingredients: Using room temperature eggs and milk is crucial for achieving maximum rise. Cold ingredients can prevent proper puffing.
- Preheating the Pan: Don’t skip preheating the cast iron skillet. The hot pan and sizzling butter create steam that helps the Dutch baby rise dramatically.
- Batter Consistency: The batter should be thin, similar to crepe batter. If it seems too thick, add an additional tablespoon of milk.
- Even Browning: Rotate the pan halfway through baking if your oven has hot spots, but do so quickly to minimize heat loss.
- Serving Timing: Plan to serve immediately after removing from the oven. The impressive puff begins to deflate quickly, though the taste remains delicious even as it settles.
Variations and Substitutions
- Flavor Infusions: Add 1/2 teaspoon of cinnamon, cardamom, or lemon zest to the batter for different flavor profiles.
- Milk Alternatives: Substitute the regular milk with almond milk, oat milk, or buttermilk for different flavors and textures.
- Seasonal Fruit Options: Adapt to the seasons with sliced peaches or nectarines in summer, sautéed apples or pears in fall, or citrus segments in winter.
- Savory Version: Omit the sugar and vanilla, add herbs like thyme or chives to the batter, and top with sautéed mushrooms, spinach, and a sprinkle of Parmesan cheese instead of fruit.
- Gluten-Free Option: Substitute the all-purpose flour with a 1:1 gluten-free flour blend. The texture may be slightly different but still delicious.
Common FAQs
1. Why didn’t my Dutch baby puff up properly?
The most common reasons are cold ingredients, opening the oven door during baking, or an oven that hasn’t reached the proper temperature. Make sure eggs and milk are at room temperature, the oven is fully preheated, and the skillet is hot before adding the batter.
2. Can I make Dutch baby batter ahead of time?
You can prepare the batter up to 24 hours in advance and store it covered in the refrigerator. Let it come to room temperature before baking for the best rise.
3. What can I use if I don’t have a cast iron skillet?
Any oven-safe skillet or baking dish will work, though cast iron provides the best heat retention and browning. If using glass or ceramic, reduce the oven temperature by 25°F and possibly extend baking time by a few minutes.
4. Is a Dutch baby the same as a German pancake?
Yes, they’re essentially the same dish, also sometimes called a Bismarck or Dutch puff. Despite the name “Dutch,” it’s believed to have German origins and was likely named by German-American immigrants.
5. Can I make mini Dutch babies for individual servings?
Absolutely! Divide the batter among 4 well-buttered 6-inch cast iron skillets or oven-safe ramekins and reduce the cooking time to about 12-15 minutes.
Storage and Make-Ahead Tips
- Servicio inmediato: Los Dutch babies se disfrutan mejor inmediatamente después de hornearlos, cuando están en su punto más impresionante y delicioso.
- Sobras: aunque no es lo ideal, las sobras se pueden guardar en un recipiente hermético en el refrigerador hasta por 2 días.
- Recalentamiento: Calienta las sobras en un horno a 175 °C (350 °F) durante 5 minutos hasta que estén bien calientes. La textura no será la misma que la del pollo fresco, pero sigue estando delicioso.
- Preparación de comidas: Los ingredientes secos se pueden mezclar y almacenar juntos, y los ingredientes húmedos se pueden combinar por separado y refrigerar durante la noche. Mézclalos justo antes de hornear.
- Preparación de las bayas: lave y prepare las bayas la noche anterior y guárdelas en el refrigerador para un armado aún más rápido en la mañana.
Este desayuno Dutch Baby con frutos rojos transforma ingredientes sencillos de la despensa en una pieza central espectacular que hará que cualquier mañana sea especial. Ya sea para un brunch relajado de fin de semana o para sorprender a tus seres queridos con un desayuno entre semana, esta receta espectacular requiere un mínimo esfuerzo para un máximo impacto. El contraste entre el panqueque caliente y cremoso y los frutos rojos frescos crea un equilibrio perfecto que sin duda se convertirá en uno de tus favoritos en casa.