Introducción
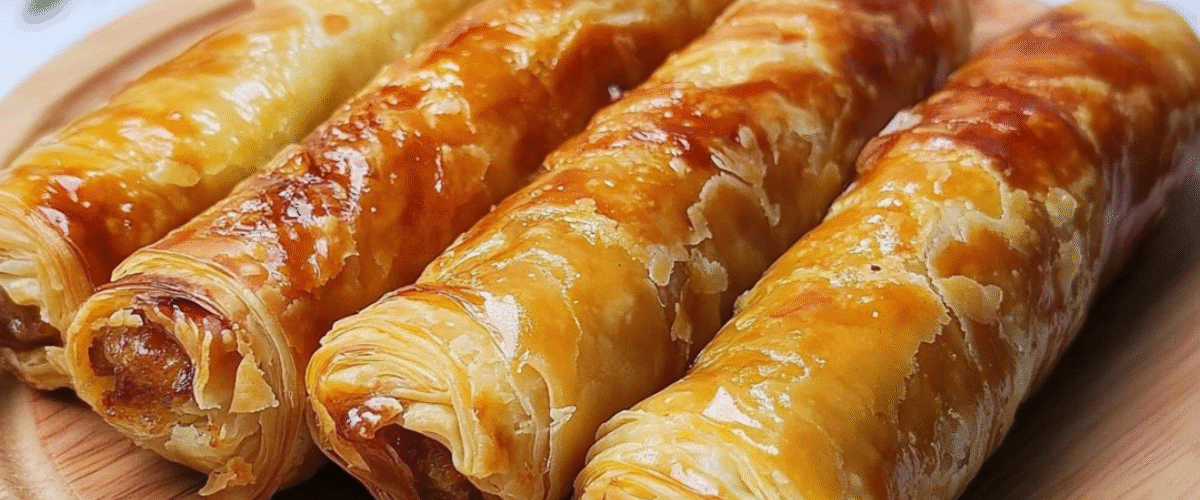
Estos rollitos de hojaldre dorados y hojaldrados, rellenos de una sabrosa mezcla de carne, cebolla y papa, son una auténtica obra maestra culinaria que merece todos los elogios. Cada bocado ofrece la combinación perfecta de masa tierna y relleno sustancioso, lo que los hace ideales para cenas familiares, reuniones especiales o comidas preparadas con antelación. La técnica de pincelar los rollitos con huevo batido antes de hornearlos crea ese irresistible acabado dorado, mientras que el relleno se mantiene jugoso y sabroso. Ya sea que los sirva como plato principal con una simple ensalada o como un aperitivo sustancioso, estos versátiles rollitos de hojaldre rellenos de carne sin duda impresionarán a todos en su mesa y harán que le pidan la receta.
Ingredientes
Para la masa:
- 700 g (5½ tazas) de harina para todo uso
- 350 ml (1½ tazas) de agua hirviendo
- 1 cucharadita de sal
- 2 cucharadas de aceite vegetal
- 1 cucharadita de polvo para hornear
- 50 g (3½ cucharadas) de mantequilla derretida para untar la masa
Para el relleno:
- 400 g (14 oz) de carne molida (de res, de cerdo o una combinación)
- 4 cebollas medianas, finamente picadas
- 2 patatas medianas, peladas y ralladas
- Sal al gusto
- Especias al gusto (sugerencias: pimienta negra, pimentón, comino o su mezcla de especias favorita)
- 50 ml (3½ cucharadas) de agua
Para la cobertura:
- 1 yema de huevo mezclada con 1 cucharadita de leche (para pintar con huevo)
- 50 g (3½ cucharadas) de mantequilla derretida para pincelar los panecillos terminados
- Opcional: queso rallado para espolvorear por encima.
Instrucciones
Preparación de la masa:
- En un tazón grande, combine la harina, la sal y el polvo para hornear.
- Añade el agua hirviendo y el aceite vegetal a los ingredientes secos.
- Mezcle con una cuchara hasta que esté lo suficientemente frío como para manipularlo, luego amase con las manos hasta que se forme una masa suave y elástica (aproximadamente 5 a 7 minutos).
- Cubre la masa con un paño de cocina o film transparente y déjala reposar 15 minutos a temperatura ambiente. Esto permite que el gluten se relaje, facilitando así su extensión.
Preparación del relleno:
- Mientras reposa la masa, prepare el relleno. Pique finamente la cebolla y ralle las patatas peladas.
- En un tazón grande, combine la carne molida, las cebollas picadas y las papas ralladas.
- Añade sal y las especias elegidas al gusto.
- Añade 50 ml de agua a la mezcla y remueve bien hasta que esté bien integrada. El agua ayuda a mantener la humedad del relleno durante el horneado.
Montaje de los rollos:
- Precaliente el horno a 180°C (350°F) y cubra una bandeja para hornear con papel pergamino.
- Divide la masa en 4-5 porciones iguales, dependiendo del tamaño que quieras que tengan los rollitos.
- Sobre una superficie ligeramente enharinada, extienda cada porción de masa hasta formar un rectángulo fino de aproximadamente 25 cm × 35 cm (10 × 14 pulgadas).
- Pincele cada rectángulo de masa con mantequilla derretida.
- Extiende una capa uniforme del relleno de carne sobre cada rectángulo de masa, dejando un pequeño borde (de aproximadamente 1 cm/½ pulgada) alrededor de los bordes.
- Starting from the longer side, carefully roll up the dough with the filling inside, creating a long log shape.
- Pinch the edges and ends to seal the roll, preventing the filling from leaking during baking.
- Place the rolls seam-side down on the prepared baking sheet, leaving some space between them as they will expand during baking.
Baking the Rolls:
- In a small bowl, mix the egg yolk with 1 teaspoon of milk to create an egg wash.
- Brush the tops and sides of each roll generously with the egg wash. This will give them a beautiful golden color and shiny appearance after baking.
- Optional: If desired, sprinkle some grated cheese on top of the rolls before baking.
- Bake in the preheated oven for 45 minutes, or until the rolls are golden brown and the filling is cooked through.
- Once baked, remove from the oven and immediately brush with the remaining melted butter for extra flavor and a soft crust.
- Allow the rolls to cool for 5-10 minutes before slicing and serving.
Nutritional Information and Timing
Preparation Time: 30 minutes
Resting Time: 15 minutes
Baking Time: 45 minutes
Total Time: 1 hour 30 minutes
Servings: 8-10 (4-5 rolls, sliced into portions)
Per Serving (approximate, based on 10 servings):
- Calories: 420 kcal
- Protein: 15g
- Carbohydrates: 50g
- Fat: 18g
- Fiber: 3g
- Sodium: 380mg (varies based on added salt)
Cooking Tips and Tricks
- Dough Temperature: Using boiling water in the dough creates a unique texture that’s both tender and sturdy enough to hold the filling. Make sure the water is truly boiling when added to the flour.
- Perfect Filling Consistency: The filling should be moist but not wet. If it seems too dry, add a little more water; if too wet, add a bit more ground meat or a tablespoon of breadcrumbs.
- Sealing Technique: To ensure your rolls don’t open during baking, pinch the seams firmly and place the rolls seam-side down on the baking sheet.
- Even Baking: For consistent results, try to make all rolls approximately the same size and thickness. This ensures they will bake evenly and be done at the same time.
- Testing Doneness: To check if the rolls are fully cooked, insert a meat thermometer into the center of one roll – it should read at least 160°F (71°C) for beef or pork filling.
- Resting Period: Allow the baked rolls to rest for 5-10 minutes before slicing. This helps the juices redistribute throughout the filling, making for a moister, more flavorful result.
- Cutting Technique: Use a serrated knife with a gentle sawing motion to slice the rolls without compressing them.
Variations and Substitutions
- Meat Options: While the recipe calls for ground meat, you can use beef, pork, lamb, chicken, or turkey, depending on your preference. For a richer flavor, try using a combination of different meats.
- Vegetarian Version: Replace the meat with a mixture of mushrooms, lentils, and walnuts for a hearty vegetarian alternative with similar texture.
- Cheese Addition: Add 100-150g of grated cheese (such as cheddar, mozzarella, or gouda) to the filling for extra richness and flavor.
- Herb Enhancement: Fresh herbs like parsley, dill, or cilantro can be added to the filling for bright, fresh notes.
- Spice Variations: Experiment with different spice blends to change the character of the dish – try Italian seasoning, Cajun spices, or Middle Eastern spice blends like za’atar or baharat.
- Gluten-Free Option: The dough can be made with a good-quality gluten-free flour blend, but you may need to adjust the amount of water slightly.
- Mini Versions: Instead of large rolls, make smaller individual-sized rolls by cutting each dough rectangle in half before filling and rolling.
Common FAQs
Can I prepare these rolls ahead of time?
Yes, you can prepare the rolls up to the point of baking and refrigerate them for up to 24 hours. Bring them to room temperature for about 30 minutes before baking, or add 5-10 minutes to the baking time if cooking directly from the refrigerator.
Can I freeze these pastry rolls?
Absolutely! You can freeze the rolls either before or after baking. For unbaked rolls, freeze them on a baking sheet until solid, then wrap individually in plastic wrap and store in a freezer bag for up to 3 months. Bake from frozen, adding about 15-20 minutes to the baking time. For baked rolls, cool completely, wrap well, and freeze. Reheat in a 350°F (180°C) oven for 15-20 minutes until heated through.
Why did my dough turn out tough?
Overmixing or overworking the dough can develop too much gluten, resulting in a tough texture. Mix until just combined and knead only as long as needed to achieve a smooth dough. Also, make sure to let the dough rest for the full 15 minutes before rolling.
How can I prevent the filling from making the dough soggy?
Make sure your filling isn’t too wet – the grated potatoes should be pressed lightly to remove excess moisture. Also, spreading a thin layer of butter on the dough before adding the filling creates a barrier that helps prevent sogginess.
What sides pair well with these meat-filled rolls?
These rolls are quite hearty on their own but pair beautifully with a fresh green salad, roasted vegetables, or a simple soup. A dollop of sour cream or yogurt on the side also complements the flavors nicely.
Storage and Make-Ahead Tips
- Refrigeration: Leftover baked rolls can be stored in an airtight container in the refrigerator for up to 3-4 days.
- Reheating: For best results, reheat the rolls in a 350°F (180°C) oven for 10-15 minutes until warmed through. This helps restore the crispy exterior. Microwaving is quicker but may result in a softer crust.
- Congelación de panecillos: Deje enfriar completamente los panecillos y luego envuélvalos individualmente en film transparente y papel aluminio. Congélelos hasta por 3 meses. Descongélelos durante la noche en el refrigerador antes de recalentarlos.
- Congelación de panecillos sin hornear: Prepare los panecillos hasta el paso del baño de huevo y luego congélelos en una bandeja para hornear hasta que estén firmes. Envuelva cada panecillo firmemente en film transparente y guárdelos en una bolsa para congelar. Cuando esté listo para hornear, aplique el baño de huevo a los panecillos congelados y hornéelos a 180 °C (350 °F) durante unos 60-65 minutos, o hasta que estén dorados y bien calientes.
- Masa para preparar con antelación: La masa se puede preparar hasta con 24 horas de antelación y guardar en el refrigerador, bien envuelta en plástico. Deje que alcance la temperatura ambiente antes de extenderla.
- Relleno para preparar con antelación: El relleno se puede preparar hasta con 24 horas de antelación y guardar en un recipiente hermético en el refrigerador.
- Sugerencia de presentación: Estos rollitos son deliciosos servidos calientes pero también se pueden disfrutar a temperatura ambiente, lo que los hace perfectos para picnics o almuerzos para llevar.
Estos sabrosos rollitos rellenos de carne merecen elogios por su perfecta combinación de masa hojaldrada y un relleno sustancioso. La simplicidad de la receta contrasta con los impresionantes resultados, convirtiéndolos en una maravillosa adición al repertorio de cualquier cocinero. Ya sea para compartir en reuniones familiares, servir en celebraciones especiales o disfrutarlos como una reconfortante cena entre semana, estos versátiles rollitos sin duda se convertirán en una receta preciada que se transmitirá de generación en generación. ¡Nos quitamos el sombrero ante quien creó esta obra maestra culinaria!