Introducción
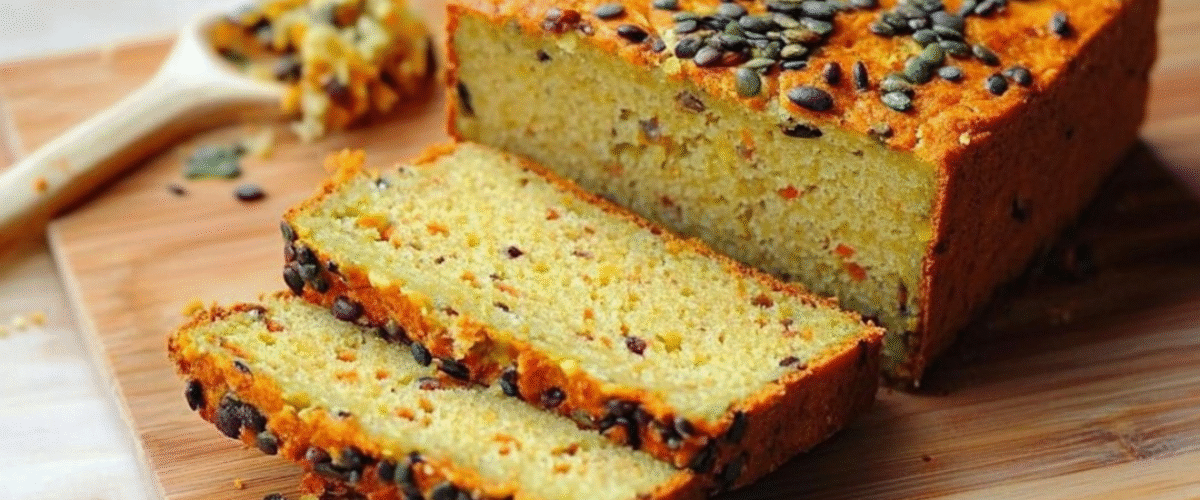
Descubre el maravilloso mundo del pan de legumbres con esta excepcional receta de Pan de Lentejas Coral. Este innovador pan transforma las lentejas coral, ricas en proteínas, en un pan nutritivo y sustancioso que ofrece un sabor excepcional y grandes beneficios para la salud. A diferencia de las recetas tradicionales a base de trigo, este pan ofrece un sabor único a nuez con una textura deliciosa que combina a la perfección con acompañamientos tanto salados como dulces. Perfecto para panaderos que cuidan su salud, personas con sensibilidad al trigo o quienes buscan diversificar su pan, esta sencilla pero gratificante receta se convertirá en un clásico en tu repertorio culinario.
Ingredientes
Para el pan:
- 500 g (2½ tazas) de lentejas coral (también conocidas como lentejas rojas)
- 20 cl (200 ml o ¾ taza + 1 cucharada) de agua
- 10 g (aproximadamente 1 cucharada) de levadura de panadería fresca
- 2 cucharaditas (10 g) de sal
- 5 cl (50 ml o 3½ cucharadas) de aceite de oliva
- 50 g (aproximadamente ⅓ de taza) de semillas mixtas (como girasol, calabaza, lino, sésamo o chía)
Instrucciones
Preparación (día anterior):
- Coloque las lentejas coral en un recipiente grande y cúbralas completamente con agua fría, asegurándose de que el nivel del agua esté al menos 2 pulgadas por encima de las lentejas.
- Cubre el recipiente con un paño de cocina limpio y deja las lentejas en remojo a temperatura ambiente de 12 a 24 horas. Las lentejas se expandirán considerablemente al absorber agua.
Elaboración del pan (Día de horneado):
- Escurre bien las lentejas remojadas con un colador. Enjuágalas con agua fría corriente hasta que el agua salga clara.
- Desmenuzar la levadura fresca de panadería en trozos pequeños.
- Añade las lentejas enjuagadas a una licuadora de alta potencia junto con la levadura desmenuzada, la sal, el aceite de oliva y el agua tibia (aproximadamente 100°F/38°C).
- Licúa la mezcla a alta velocidad hasta que esté completamente suave y homogénea, con una consistencia espesa similar a la de una masa. Esto puede tardar de 1 a 2 minutos, dependiendo de la potencia de tu licuadora. Quizás tengas que detener el proceso para raspar los lados de vez en cuando.
- Cubre un molde de pan estándar (de aproximadamente 9″ × 5″ o 23 × 13 cm) con papel pergamino, dejando un poco de papel sobrante para poder retirarlo fácilmente.
- Vierta la masa de lentejas en el molde de pan preparado, alisando la parte superior con una espátula.
- Esparce las semillas mezcladas uniformemente sobre la superficie de la masa, presionándolas suavemente para que se adhieran.
- Cubre el molde de pan sin apretar con un paño de cocina limpio y colócalo en un lugar cálido y sin corrientes de aire para que suba durante 30 minutos. Es posible que la masa no duplique su volumen como el pan de trigo tradicional, pero debería expandirse un poco.
- Mientras la masa sube, precaliente el horno a 180°C (350°F).
- Después del tiempo de reposo, coloque el molde para pan en la rejilla central del horno precalentado y hornee durante 45 minutos, o hasta que el pan esté firme al tacto y al insertar un palillo en el centro, éste salga limpio.
- Sacar el pan del horno y dejarlo reposar en el molde durante 10 minutos.
- Using the parchment paper overhang, carefully lift the bread out of the pan and transfer it to a wire cooling rack. Remove the parchment paper and allow the bread to cool completely before slicing, at least 1 hour.
Nutritional Information & Timing
Prep Time: 10 minutes (plus 12-24 hours soaking time) Rising Time: 30 minutes Bake Time: 45 minutes Cooling Time: 1 hour Total Time: 2 hours 25 minutes (plus soaking time) Servings: 1 loaf (approximately 12 slices)
Nutritional Information (per slice):
- Calories: 190
- Protein: 12g
- Carbohydrates: 26g
- Dietary Fiber: 8g
- Fat: 5g
- Iron: 3mg (15% DV)
- Folate: 90μg (23% DV)
- Magnesium: 36mg (9% DV)
- Potassium: 320mg (9% DV)
Cooking Tips and Tricks
- Lentil Selection: While the recipe calls for coral (red) lentils, they can sometimes be labeled as masoor dal or Egyptian lentils. These specific lentils are ideal because they break down easily when cooked, creating a smoother texture in the final bread.
- Blending Technique: For the smoothest batter, blend in batches if your blender isn’t powerful enough to handle the entire mixture at once. A food processor can work as an alternative, though the texture may be slightly less smooth.
- Water Temperature: When adding water to the yeast mixture, ensure it’s lukewarm (around 100°F/38°C). Water that’s too hot will kill the yeast, while water that’s too cold won’t activate it properly.
- Testing Doneness: Since this bread has a different structure than wheat bread, traditional doneness tests may not work the same way. Besides the toothpick test, look for these signs: the bread should pull away slightly from the sides of the pan, have a firm crust, and sound hollow when tapped on the bottom.
- Seed Variations: Toast your seeds before adding them to the top for enhanced flavor. Just be careful not to burn them – a few minutes in a dry skillet should do the trick.
- Slicing Tips: This bread can be more delicate than wheat bread, especially when warm. Allow it to cool completely before slicing with a sharp serrated knife using a gentle sawing motion to prevent crumbling.
- Enhancing Flavor: For a deeper flavor profile, add 1 teaspoon of ground cumin or coriander to the batter, or incorporate fresh herbs like rosemary or thyme.
Variations and Substitutions
- Yeast Alternatives:
- Replace fresh baker’s yeast with 3.5g (approximately 1 teaspoon) of active dry yeast or instant yeast
- For a yeast-free version, substitute with 1 tablespoon baking powder and add 1 tablespoon of apple cider vinegar to the liquid ingredients
- Oil Options:
- Substitute olive oil with avocado oil, coconut oil, or melted butter
- For a lower-fat version, replace half the oil with unsweetened applesauce
- Flavor Enhancements:
- Add 2 tablespoons of maple syrup or honey for a slightly sweeter bread
- Incorporate 2 tablespoons of nutritional yeast for a cheese-like flavor
- Mix in 2 teaspoons of dried herbs (rosemary, thyme, oregano) for a savory herb bread
- Add 1 teaspoon of turmeric and 1/2 teaspoon of black pepper for a golden, anti-inflammatory boost
- Texture Variations:
- For a heartier bread, blend 3/4 of the lentils and leave 1/4 roughly mashed for texture
- Add 50g (1/2 cup) of rolled oats to the batter for added structure and fiber
- Include 2 tablespoons of psyllium husk powder for improved binding and additional fiber
- Seed and Nut Blends:
- Mediterranean blend: sesame, sunflower, and pumpkin seeds
- Omega-3 blend: ground flaxseed, chia seeds, and hemp seeds
- Protein boost: chopped walnuts, almonds, and pumpkin seeds
Common FAQs
Why do the lentils need to soak overnight?
Soaking the lentils serves multiple purposes: it makes them easier to blend into a smooth batter, initiates the breakdown of phytic acid (improving nutrient absorption), reduces cooking time, and helps with digestibility. For best results, don’t skip this step.
My bread didn’t rise much during the resting period. Did I do something wrong?
Lentil bread naturally rises less than wheat bread because it lacks gluten, which creates the structure that traps air bubbles. As long as your yeast was fresh and properly activated (in lukewarm water), your bread should still turn out well with a denser texture than traditional bread.
Can I use canned lentils instead of dried ones?
While canned lentils are convenient, they’re not recommended for this recipe. Dried lentils that have been properly soaked create the right consistency and flavor. Canned lentils often contain added salt and preservatives that can affect the final taste and texture.
How do I store this bread to keep it fresh?
Lentil bread tends to dry out faster than wheat bread. Once completely cooled, store it wrapped tightly in plastic wrap or in an airtight container at room temperature for up to 2 days, or in the refrigerator for up to 5 days. For longer storage, freeze as directed below.
Is this bread suitable for people with celiac disease or gluten sensitivity?
Yes, this bread is naturally gluten-free as it contains no wheat or other gluten-containing grains. However, if you have celiac disease, ensure your yeast is certified gluten-free, as some commercial yeasts may be processed in facilities that also handle wheat products.
Storage and Make-Ahead Tips
- Short-term Storage:
- Room Temperature: Keep wrapped in a clean kitchen towel or stored in a bread box for 1-2 days.
- Refrigerator: Store in an airtight container or wrapped tightly in plastic wrap for up to 5 days. Bring to room temperature before serving for best flavor.
- Freezing:
- Whole Loaf: Cool completely, wrap tightly in plastic wrap, then aluminum foil, and freeze for up to 3 months.
- Rebanadas: Congele rápidamente cada rebanada en una bandeja para hornear durante 2 horas y luego transfiéralas a una bolsa para congelar con papel vegetal entre ellas para evitar que se peguen. Congele hasta por 3 meses.
- Descongelación y Refrescamiento:
- Descongele el pan congelado a temperatura ambiente durante 2 a 3 horas o durante la noche en el refrigerador.
- Para refrescar: rocíe con un poco de agua y caliente en un horno a 150 °C (300 °F) durante 5 a 10 minutos, o tueste rebanadas individuales directamente congeladas.
- Estrategia de preparación anticipada:
- Prepara varios panes cuando tengas tiempo y congélalos para usarlos más adelante.
- Remoje más lentejas, tritúrelas y congele la masa cruda en porciones del tamaño de un pan. Descongélelas durante la noche en el refrigerador, deje que alcancen la temperatura ambiente y luego proceda con el levado y horneado.
- Sugerencias de presentación:
- Fresco: Disfrútelo dentro de las primeras 24 horas para obtener la mejor textura y sabor.
- Tostado: Las rebanadas de este pan se tuestan maravillosamente y resisten bien los untables y los aderezos.
- Revitalizado: Si el pan se seca, pincela ligeramente las rebanadas con agua o aceite de oliva y tuéstalas para refrescarlas.
Este pan de lentejas coral ofrece una alternativa nutritiva y rica en proteínas al pan de trigo tradicional, con un sabor y una textura excepcionales. Su sencilla preparación y sus numerosos beneficios para la salud lo convierten en el complemento perfecto para cualquier comida del día. Ya sea con aderezos salados, untables dulces o como acompañamiento de sopas y guisos, este versátil pan se convertirá en uno de tus favoritos. ¡Que disfrutes