Introducción
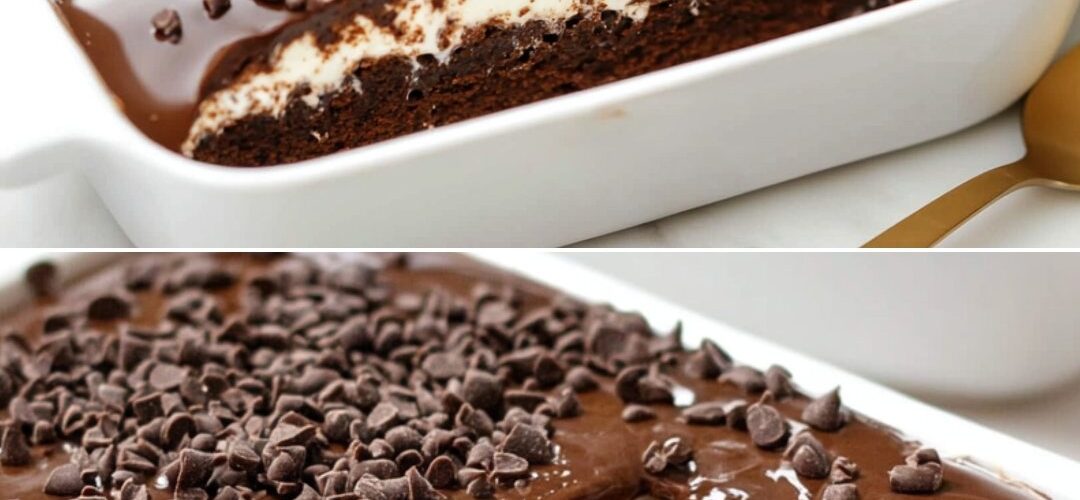
Consiéntete con el sueño de cualquier amante del chocolate con este suntuoso brownie de chocolate sin huevo, ¡que no requiere horno! Este postre de tres capas presenta una base de brownie de chocolate jugosa y cremosa, cubierta con una nube de crema batida y un brillante ganache de chocolate. Perfecto para ocasiones especiales o para cuando te apetezca chocolate, este postre ofrece el equilibrio perfecto de texturas e intensidades. Al no llevar huevo, es apto para vegetarianos, y su método de preparación sin horno garantiza el éxito incluso sin utensilios de repostería convencionales. Tanto si eres un repostero experimentado como si eres principiante en la cocina, esta receta infalible te ofrece resultados de calidad profesional con el mínimo esfuerzo.
Ingredientes
Para la base de brownie:
- 100 g (3,5 oz) de chocolate negro semidulce, picado
- 100 g (3,5 oz o 7 cucharadas) de mantequilla sin sal
- 80 g (1/3 de taza) de azúcar granulada
- 190 g (1+1/2 tazas) de harina para todo uso (maida)
- 15 g (2 cucharadas) de cacao en polvo
- 5 g (1 cucharadita) de polvo para hornear
- 120 ml (1/2 taza) de leche tibia
- 2,5 ml (1/2 cucharadita) de extracto de vainilla
Para la capa de crema batida:
- 200 ml (aproximadamente 3/4 de taza + 1 cucharada) de crema batida (crema espesa)
- 30 g (1/4 taza) de azúcar en polvo
Para el ganache de chocolate:
- 100 g (3,5 oz) de chocolate negro semidulce, picado
- 80 ml (1/3 de taza) de leche caliente
Aderezo opcional:
- Chispas de chocolate o virutas de chocolate
Instrucciones
Paso 1: Preparar la sartén
- Cubre una bandeja o plato para hornear de 10×5 pulgadas con papel pergamino, dejando un poco de papel sobrante en los lados para poder retirarlo fácilmente más tarde.
Paso 2: Prepara la base del brownie
- En un tazón mediano apto para microondas, combine el chocolate negro picado y la mantequilla. Caliente en el microondas a intervalos de 30 segundos, revolviendo entre cada intervalo, hasta que se derrita por completo y quede una mezcla homogénea.
- Añade azúcar a la mezcla de chocolate y remueve hasta que esté bien integrada. Deja enfriar un poco.
- En un recipiente aparte, tamice juntos la harina, el cacao en polvo y el polvo para hornear.
- Añade gradualmente los ingredientes secos a la mezcla de chocolate, alternándolos con leche tibia. Mezcla hasta que estén bien integrados.
- Incorpore el extracto de vainilla.
- Vierta la masa en el molde preparado, extendiéndola uniformemente.
- Cubra con papel aluminio y cocine al vapor durante 25-30 minutos. Para cocinar al vapor: coloque la olla en una olla más grande con aproximadamente 2,5 cm de agua caliente, cúbrala y cocine a fuego medio. También puede usar una vaporera o una olla a presión sin silbato.
- Comprueba si está listo insertando un palillo en el centro: debe salir con algunas migas húmedas.
- Deje que el brownie se enfríe completamente en el molde.
Paso 3: Preparar la capa de crema batida
- En un recipiente frío, bate la crema batida hasta que comience a espesar.
- Añade poco a poco el azúcar en polvo mientras continúas batiendo hasta que se formen picos firmes.
- Extiende la crema batida uniformemente sobre la capa de brownie enfriada.
- Refrigerar durante al menos 30 minutos para que cuaje.
Paso 4: Prepara el ganache de chocolate
- Place the chopped chocolate in a heat-resistant bowl.
- Pour the hot milk over the chocolate and let it sit for 1-2 minutes.
- Stir gently until the chocolate is completely melted and the mixture is smooth and glossy.
- Allow the ganache to cool slightly but remain pourable.
Step 5: Assemble the Dessert
- Pour the chocolate ganache over the chilled whipped cream layer, ensuring it spreads evenly to the edges.
- Gently tap the dish to smooth the ganache.
- Sprinkle with chocolate shavings or sprinkles, if desired.
- Refrigerate for at least 4 hours, or preferably overnight, before serving.
Nutritional Information and Timing
Preparation Time: 30 minutes
Cooking Time: 30 minutes (steaming)
Chilling Time: Minimum 4-5 hours
Total Time: 5-6 hours (including chilling)
Servings: 8-10 portions
Per Serving (approximate values):
- Calories: 350-400 kcal
- Fat: 22g
- Carbohydrates: 38g
- Protein: 5g
- Fiber: 2g
- Sugar: 20g
- Sodium: 75mg
Cooking Tips and Tricks
- Chocolate selection: Use good quality chocolate with 50-60% cocoa content for the best flavor and texture. Higher cocoa percentages will result in a less sweet, more intense chocolate flavor.
- Steam cooking perfection: When steaming the brownie, ensure the water doesn’t touch the bottom of your brownie pan. The steam should cook it gently to achieve the perfect fudgy texture.
- Even layers: For professional-looking results, use an offset spatula to spread both the whipped cream and ganache layers evenly.
- Whipping cream success: Chill your mixing bowl and beaters in the freezer for 15 minutes before whipping the cream. This helps it whip faster and hold its shape better.
- Ganache consistency: The ideal ganache for topping should be pourable but not too runny. If it’s too thick, add a tablespoon of hot milk; if too thin, allow it to cool longer or add more chopped chocolate.
- Clean cuts: For picture-perfect slices, dip your knife in hot water and wipe dry between each cut.
- Temperature matters: Remove the dessert from the refrigerator about 10-15 minutes before serving to allow the ganache to soften slightly, making it easier to cut and enhancing the flavor.
Variations and Substitutions
- Coffee-infused: Add 1 teaspoon of instant coffee powder to the warm milk for a mocha flavor profile.
- Nutty delight: Sprinkle a layer of chopped toasted nuts (walnuts, hazelnuts, or almonds) between the brownie and whipped cream layers.
- Gluten-free option: Replace all-purpose flour with a gluten-free flour blend in equal amounts; add 1/4 teaspoon xanthan gum if your blend doesn’t already include it.
- Vegan adaptation: Use plant-based butter, plant-based whipping cream, and ensure your chocolate doesn’t contain milk solids.
- Mint chocolate: Add 1/4 teaspoon of peppermint extract to the whipped cream layer for a refreshing twist.
- Berry addition: Layer fresh raspberries or strawberries between the brownie and whipped cream for a fruity contrast.
- Caramel lover’s variation: Drizzle caramel sauce between layers and on top of the ganache.
- Spiced chocolate: Add 1/2 teaspoon of cinnamon and a pinch of cayenne pepper to the brownie mixture for a Mexican chocolate inspired dessert.
Common FAQs
Q: Can I make this dessert ahead of time?
A: Absolutely! This dessert actually improves with time as the flavors meld together. You can prepare it up to 2 days in advance and keep refrigerated until serving.
Q: Why is my brownie layer too dry?
A: Over-steaming or using too little butter can result in a dry brownie. Ensure you’re steaming for the recommended time and measuring ingredients accurately.
Q: My whipped cream isn’t holding its shape. What went wrong?
A: Cream whips best when cold. Ensure both your cream and equipment are well-chilled before whipping. Also, make sure you’re using heavy whipping cream with at least 35% fat content.
Q: Can I freeze this dessert?
A: Yes, but for best results, freeze before adding the ganache layer. Thaw overnight in the refrigerator, then add the ganache before serving.
Q: How do I know when the brownie is cooked properly without an oven?
A: Insert a toothpick into the center – it should come out with a few moist crumbs, not wet batter. The brownie should also feel set when gently pressed in the center.
Storage and Make-Ahead Tips
- Refrigerator storage: This dessert will keep well in the refrigerator for up to 5 days when stored in an airtight container or covered tightly with plastic wrap.
- Freezing instructions: To freeze, cut into individual portions and place on a baking sheet until solid. Then wrap each piece in plastic wrap, followed by aluminum foil. Freeze for up to 2 months. Thaw overnight in the refrigerator.
- Component preparation: Each layer can be prepared separately in advance. The brownie layer can be made 1-2 days ahead and kept at room temperature (well-wrapped). The ganache can be made up to 3 days ahead and gently reheated before using.
- Transport tips: If transporting this dessert, keep it in the original baking dish and refrigerate until the last possible moment. Transport in a cooler with ice packs to maintain its structure.
- Sugerencias de presentación : Para una presentación elegante, sirva con bayas frescas, una pizca de cacao en polvo o una pequeña bola de helado de vainilla al costado.
- Transformación de sobras : transforme las sobras en un postre cortándolas en cubos y colocándolas en capas con crema batida adicional y fruta fresca.
Este postre de brownie de chocolate sin horno y sin huevo ofrece la solución perfecta para saciar tus antojos de chocolate sin necesidad de hornear. La combinación de la base de brownie, la cremosa capa intermedia y la rica cobertura de chocolate crea una sinfonía de texturas y sabores que seguro te impresionará. Ya sea para una cena, una celebración especial o simplemente como un capricho de fin de semana, este postre ofrece resultados gourmet con una facilidad increíble. Al poder prepararlo con antelación, es perfecto para anfitriones ocupados que desean preparar algo espectacular con el mínimo estrés.