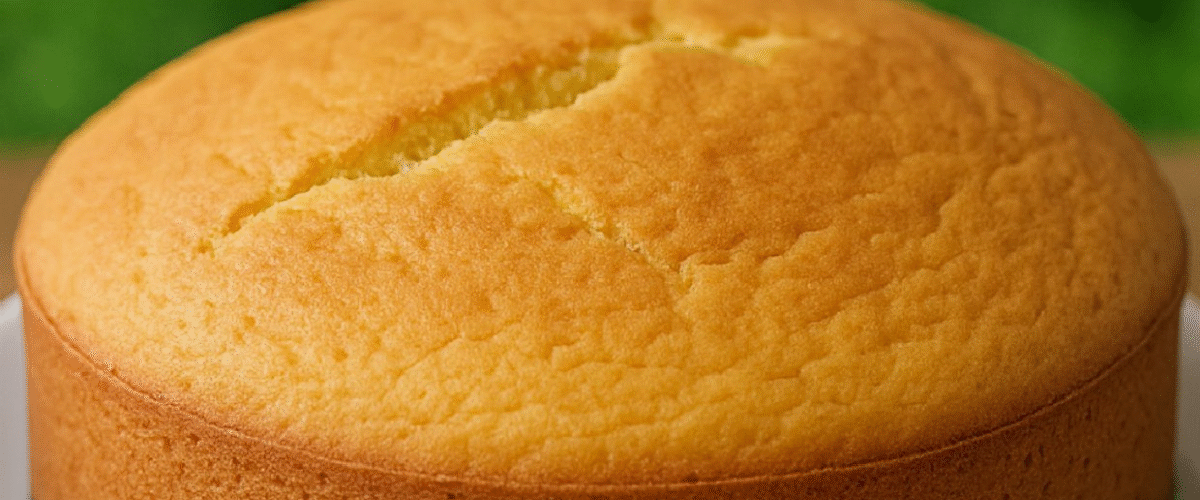
Cuando quiero un postre elegante, que guste a todos y sea increíblemente fácil, este sencillo bizcocho de 3 ingredientes es mi favorito. Es un clásico secreto de chef: sin mantequilla, sin aceite, sin leche, solo huevos, azúcar y harina. ¡Así es! Tres ingredientes básicos de la despensa y tendrás un pastel de nubes, listo para decorar o disfrutar solo.
Como chef, me encantan las recetas que hacen más con menos. Este bizcocho es pura magia cuando está bien hecho: esponjoso, ligero y perfecto para hacer capas o servir con fruta y crema. La clave está en batir bien los huevos y el azúcar. Si lo haces bien, el resto será pan comido.
Por qué te encantará este bizcocho de 3 ingredientes
- Ingredientes mínimos: Probablemente ya tengas todo lo que necesitas en tu cocina.
- Increíblemente ligero y aireado: los huevos batidos y el azúcar le dan esa textura suave que se derrite en la boca.
- Personalizable: Sírvalo solo, con capas de crema, glaséelo o cúbralo con fruta.
- Sin aceite ni mantequilla: naturalmente bajo en grasas y aún así satisfactorio.
- Apto para principiantes: ideal para panaderos noveles que buscan dominar la técnica básica de repostería.
¿Quieres más postres sencillos con pocos ingredientes? Prueba nuestro pan de yogur con huevo de 3 ingredientes o el pastel de plátano con leche condensada para microondas, ambos igual de deliciosos y fáciles de preparar.
Ingredientes del bizcocho:
- 5 huevos grandes
- 1 taza (200 g) de azúcar
- 1 taza (125 g) de harina para todo uso
Instrucciones:
1: Precalentar y preparar
- Precaliente el horno a 350°F (180°C) .
- Engrase o cubra un molde para pastel redondo de 9 pulgadas con papel pergamino para desmoldar fácilmente.
2: Batir los huevos y el azúcar
- En un tazón grande, combine los huevos y el azúcar .
- Utilice una batidora eléctrica o un batidor de mano para batir la mezcla durante 8 a 10 minutos , hasta que esté espesa, pálida y con una consistencia similar a una cinta.
3: Incorporar la harina
- Tamiza la harina sobre la mezcla de huevo y azúcar.
- Incorpore la harina con cuidado con una espátula hasta que esté bien mezclada, no mezcle demasiado para mantener la masa aireada.
4: Hornear
- Vierta la masa en el molde preparado y alise la parte superior.
- Hornee durante 45-50 minutos hasta que esté dorado y al insertar un palillo en el centro éste salga limpio.
5: Enfriar y servir
- Deje enfriar el pastel en el molde durante 10 minutos y luego transfiéralo a una rejilla.
- Dejar enfriar completamente antes de cortar o decorar.
“Con solo tres ingredientes, no solo estás haciendo un pastel, sino que estás dominando la técnica”. – @WhipItGoodBaker
Tips for the Best Sponge Cake
- Use room temperature eggs: They whip better and trap more air for maximum volume.
- Beat eggs and sugar long enough: You’re creating the structure here don’t rush this step.
- Sift your flour: To avoid clumps and ensure it folds in easily.
- Fold gently: Preserve the air bubbles you worked so hard to beat into the eggs!
Love mastering basic techniques? Be sure to try our Japanese Castella cake another sponge style cake with a soft, velvety finish.
Flavor Variations and Add Ins
Upgrade Your Sponge Cake with a Twist
- Lemon zest: Add a fresh, citrusy aroma to your batter.
- Vanilla extract: Classic and comforting just 1 tsp in the egg sugar mix.
- Almond extract: A touch adds nutty depth and enhances other flavors.
- Layer with jam and cream: For a traditional Victoria sponge look and feel.
- Soak with coffee or fruit syrup: For a moist, elegant dessert presentation.
Feeling adventurous? Top with a quick orange glaze or layer with cream and strawberries like our strawberry crunch cheesecake for a modern twist.
How to Serve and Store
Smart Storage and Creative Serving Ideas
- Serve plain: Dust with powdered sugar for a light, elegant dessert.
- With whipped cream: Add a dollop of cream and sliced fruit for a refreshing finish.
- Layered cake: Slice into layers and fill with cream cheese frosting or jam.
- Refrigeration: Store in an airtight container for up to 3 days.
- Freezing: Wrap tightly and freeze up to 1 month defrost at room temperature.
“Serve it your way dressed up or stripped back, sponge cake always delivers.” – @CakeCanvasCreator
How to Elevate a Simple Sponge Cake into a Showstopper
Serving Ideas That Impress
While this 3 ingredient sponge cake is beautiful on its own, it’s also the perfect base to transform into elegant desserts for any occasion. I often use this single sponge as a starting point for layered cakes, trifle bowls, or even quick individual desserts in glasses. Here’s how you can dress it up and turn it into something worthy of any celebration.
- Classic Strawberry Shortcake Style: Slice the sponge into two or three horizontal layers. Spread whipped cream and sliced strawberries between each layer and on top. Add a mint leaf for garnish.
- Tiramisu Twist: Soak thin slices of sponge cake with coffee and layer with mascarpone cream. Dust with cocoa powder and chill.
- Mini Layered Jars: Cut small rounds using a cookie cutter. Layer them with custard, fruit, and whipped cream in jars for stunning individual treats.
- Chocolate Drizzle: Melt dark chocolate and pour over the top. Add chopped nuts or crushed freeze dried raspberries for crunch and contrast.
- Simple fruit glaze: Blend berries with a bit of lemon juice and powdered sugar. Drizzle over the sponge for a naturally sweet topping.
Want more no fail base recipes to build creative desserts? Explore our easy homemade crepes or the soft, silky Japanese cheesecake both are blank slates ready for your imagination.
“You don’t need fancy ingredients to make a showstopper you just need a sponge and a little inspiration.” – @EverydayElegantBakes
Transform It Into a Celebration Cake
With just a bit of layering and frosting, this humble sponge becomes a celebration worthy centerpiece. Whether you’re baking for a birthday, tea party, or holiday gathering, try one of these themes to elevate your bake:
- Fruit Filled Summer Cake: Add mango, kiwi, and whipped cream for a bright, tropical cake perfect for warmer months.
- Winter Spice Layer Cake: Infuse the sponge with cinnamon and clove, then fill with cream cheese frosting and chopped candied pecans.
- Holiday Sponge Roll: Bake in a sheet pan and roll with jam or chocolate ganache. Decorate with powdered sugar for a Yule log effect.
- Minimalist Naked Cake: Stack two or three layers with light cream and fruit. Leave the sides bare for a rustic, modern finish.
Want a soft sponge to build birthday cakes or celebration towers? Pair this recipe with our perfect vanilla cupcakes or zesty lemon cake for layered dessert ideas that everyone will rave about.
“A blank sponge cake is like a fresh canvas ready to paint with berries, cream, or frosting.” – @TheLayerLover
How to Store and Freeze Sponge Cake the Right Way
Keep It Fresh and Ready to Go
The simplicity of this sponge cake means you can easily bake ahead and store it without sacrificing quality. I often make a couple at once, freeze one, and decorate the other. Here’s how to store your sponge the smart way:
- Room temperature (unfrosted): Wrap in plastic wrap and store in an airtight container for up to 3 days.
- Refrigerated (frosted): Keep in a cake carrier or covered container for up to 4 days. Let it sit at room temperature for 30 minutes before serving.
- Freezer: Wrap unfrosted sponge layers in plastic wrap, then foil. Freeze for up to 2 months. Thaw at room temperature, unwrapped, to avoid condensation ruining the texture.
Need more freezer friendly bakes? Our pineapple quick bread and 10 minute skillet bread both store beautifully and are great for prep ahead baking.
“Bake once, enjoy twice or even three times. Sponge cake is a freezer hero.” – @BakeStoreRepeat
Cómo revivir una esponja de un día
Si tu bizcocho se ha secado un poco después de uno o dos días, no te preocupes. Hay soluciones rápidas que lo revitalizan y, a veces, incluso mejoran su sabor:
- Remojo del almíbar: Mezcle partes iguales de azúcar y agua, agregue vainilla o ralladura de cítricos y pincele ligeramente las capas de bizcocho antes de armar el pastel.
- Cocínelo al vapor: Envuelva las rebanadas en papel aluminio y cocínelas al vapor durante unos minutos. Esto ablanda la miga y le da un sabor a recién horneado.
- Tostado: Para una textura completamente diferente, córtalo en rodajas y tuéstalo ligeramente. Sírvelo con mermelada o crema coagulada para un capricho rústico.
¿Te gusta experimentar con texturas? Te encantará convertir las rebanadas que te sobran en algo nuevo, como nuestro pastel de arroz con crema pastelera, un ingenioso uso de ingredientes básicos sencillos.
A veces, las sobras dan lugar a tu próxima gran idea de postre. El bizcocho nunca se desperdicia. – @SmartBakerLife
Información nutricional (por porción, basada en 8 rebanadas)
- Calorías: 280
- Carbohidratos: 40g
- Proteína: 6 g
- Grasas: 8g
- Azúcar: 24g
Preguntas frecuentes
¿Por qué se me cae el bizcocho?
La mayoría de las veces, esto se debe a que no se hornea bien, se mezcla demasiado después de añadir la harina o se abre la puerta del horno demasiado pronto. Asegúrate de que esté completamente horneado antes de sacarlo y manipúlalo con cuidado.
¿Puedo utilizar harina leudante?
Lo mejor es usar harina común. La harina leudante contiene levadura, que esta receta no necesita gracias al aire que se incorpora a los huevos.
¿Qué puedo utilizar en lugar de azúcar?
Puedes experimentar con edulcorantes naturales como el azúcar de coco, aunque la textura y el volumen pueden variar. Para obtener mejores resultados, usa azúcar granulada.
¿Puedo utilizar un batidor de mano?
Sí, pero tomará más tiempo, hasta 12-15 minutos de batido vigoroso. Se recomienda usar una batidora de pedestal o una batidora de mano eléctrica para lograr una consistencia uniforme.